![[New] In 2024, Blueprints to Masterful Valorant Thumbnail Designs on Social Platforms](https://thmb.techidaily.com/efe03172267db8e41dde950b174798601940a22588399da557fc77a3f3ce0d36.jpeg)
[New] In 2024, Blueprints to Masterful Valorant Thumbnail Designs on Social Platforms
Blueprints to Masterful Valorant Thumbnail Designs on Social Platforms
As a content creator on YouTube, you know how important it is to have a strong thumbnail that stands out from the competition. Not only does a thumbnail help attract viewers to your video, but it’s also the first thing people see when they come across your content on the platform. That’s why it’s crucial to put effort into designing an eye-catching thumbnail that accurately represents your video.
When creating a thumbnail for your Valorant video, it’s important to remember that the recommended size is 1280 x 720 pixels. This will ensure that your thumbnail looks clear and professional on all devices. In addition to size, it’s also essential to consider the composition of your thumbnail. In this article, we’ll provide tips and tricks for creating professional Valorant thumbnails that will help boost your views and engagement.
 LYRX is an easy-to-use karaoke software with the professional features karaoke hosts need to perform with precision. LYRX is karaoke show hosting software that supports all standard karaoke file types as well as HD video formats, and it’s truly fun to use.
What Is Valorant?
Valorant is a free-to-play tactical first-person shooter video game developed and published by Riot Games. The game was released in June 2020 and has quickly gained popularity due to its high-stakes, team-based gameplay and unique characters.
In Valorant, players choose from a roster of agents, each with their abilities and playstyle, and compete in 5v5 objective-based matches. The game has a variety of game modes, including the popular “Spike Rush” mode, which features a shorter round time and special abilities for all players. Valorant is available on Microsoft Windows and will soon be available on other platforms.


Why Create Thumbnails for Your Valorant YouTube Videos?
Creating a thumbnail for your Valorant YouTube video is an important step in the video creation process. A thumbnail is a visual representation of your video and can help attract viewers to your content.
When someone comes across your video in their feed, the thumbnail is often the first thing they see, so it’s crucial to make it as eye-catching and compelling as possible. A strong thumbnail can help increase your views and engagement and establish your brand as a content creator. By putting effort into designing a professional and relevant thumbnail, you can set your video apart from the competition and entice viewers to click and watch.
How To Make a Valorant Thumbnail for Free?
If you want to create a Valorant thumbnail for your YouTube videos but don’t want to spend any money, you still have plenty of options. One way to create a thumbnail for free is by using a free online design tool or thumbnail maker. Or, you can try Wondershare Filmora .
Free Download For Win 7 or later(64-bit)
Free Download For macOS 10.14 or later
Not only is Filmora a powerful video editing software, and it has a range of features and tools that make it easy to design and create custom thumbnails. Even better, you can use the trial version of Filmora to create a thumbnail for free. You need to download the trial version and start experimenting with the various design tools and templates to create a thumbnail that reflects your style and brand.
Creating a Valorant thumbnail for YouTube using Filmora can be very easy. Just follow these steps:
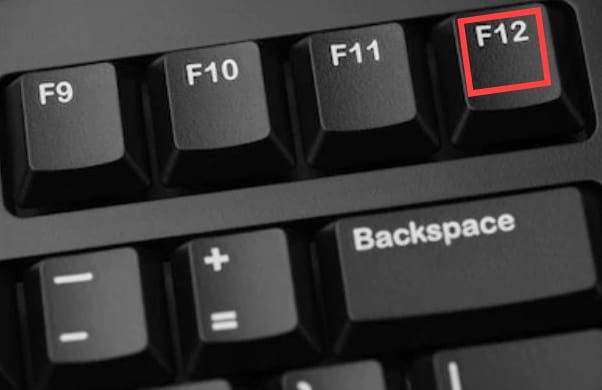
Step1 Take a screenshot of your gameplay by pressing the “F12“ key on your keyboard while in the game. This will save the screenshot to your computer.

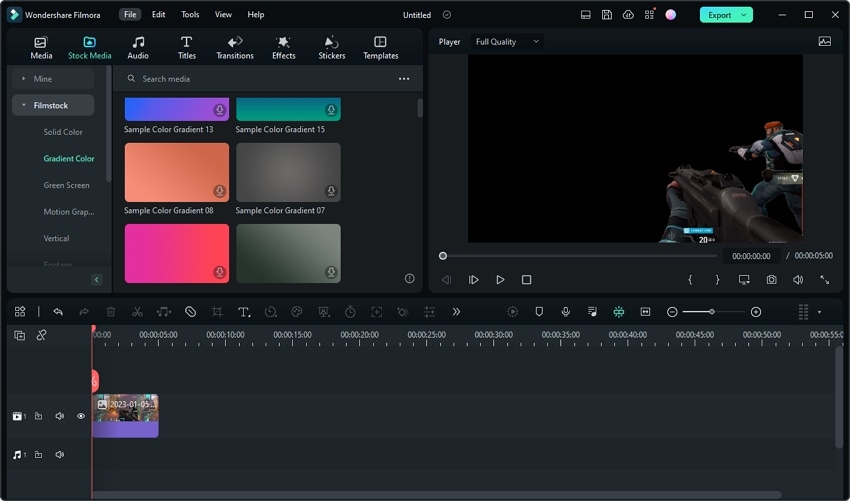
Step2 Launch Filmora and create a new project.

Step3 Import the screenshot into the media library by clicking the “Import“ button.

Step4 Drag the screenshot from the media library into the timeline.

Step5 Use the “Smart Cutout“ feature to select and cut out specific elements from the screenshot.

Step6 Choose the elements of the screenshot that you want to keep.
 Project Manager - Asset Browser for 3Ds Max

Step7 Remove any parts of the screenshot that you do not want to include in the thumbnail.


Step8 Extract the selected elements from the screenshot. You can resize the elements as desired.
Step9 Add a background to the track below the screenshot by dragging a background image from the media library into the timeline. Alternatively, you can import your image as a background by clicking the “Import“ button and selecting the image file from your computer.

Step10 Add an effect, such as a gun effect, by searching for the desired effect in the “Effects“ tab and dragging it into the timeline.

Step11 Adjust the opacity of the effect as desired.

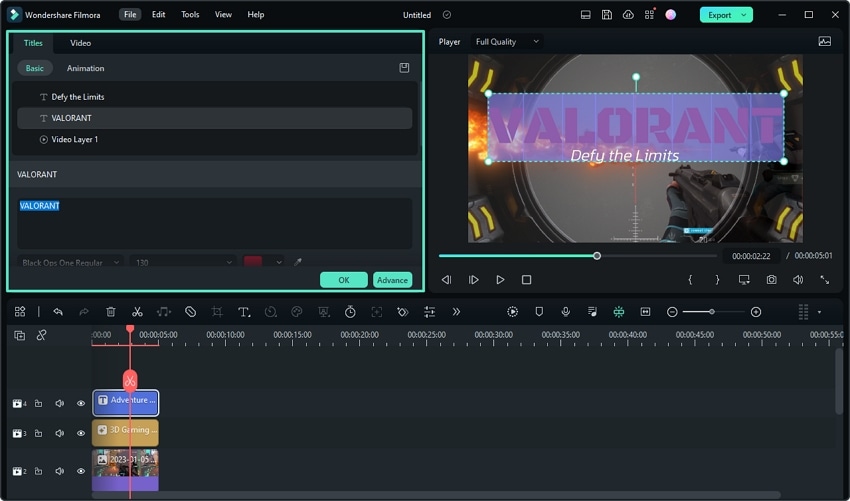
Step12 Add some titles and texts for your thumbnail.

Step13 Customize the appearance and rotation of the fire effect as desired.
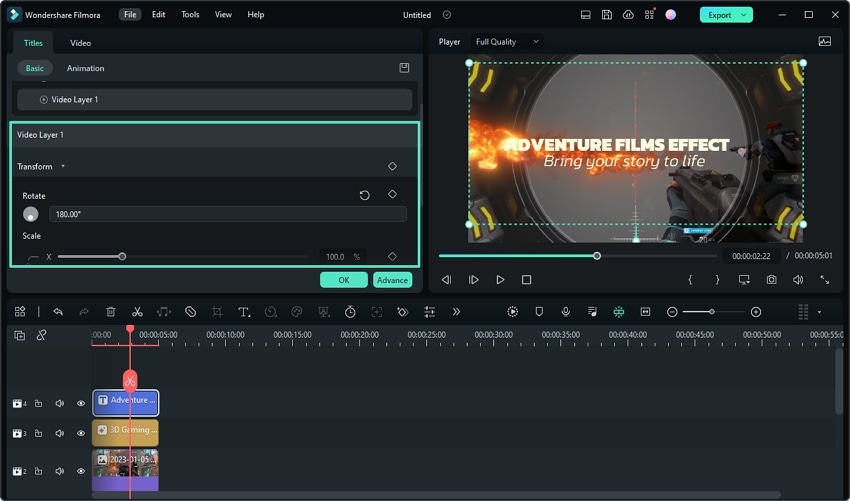
Step14 Edit the texts and adjust the appearance of the texts in the Titles window.
Step15 Choose a still frame that you like and take a snapshot of it.

Step16 Select the snapshot format and storage path. The snapshot will appear in the media library.

Step17 Right-click on the snapshot and select “Reveal in Explorer“ to find the file on your computer. You can now use it as your Valorant thumbnail.


Please note that while using the trial version of Filmora, a watermark will be added to the exported video. However, the watermark will not be added to the snapshot, so you can use the snapshot as your Valorant thumbnail without any issues.

Tips for Making Awesome Thumbnails for Your YouTube Valorant Videos
By following these tips, you can create an eye-catching and effective thumbnail for your Valorant YouTube videos that will help boost your views and engagement.
- Use high-quality images and graphics: A thumbnail with low-quality or pixelated images will not be as effective as a thumbnail with clear, high-resolution graphics.
- Use bold, eye-catching colors: Bright colors can help your thumbnail stand out in a crowded feed.
- Include relevant text: Use text to give viewers an idea of what to expect from your video and to entice them to click.
- Use clear, legible fonts: Make sure the text on your thumbnail is easy to read and doesn’t distract from the overall design.
- Keep it simple: Avoid overcrowding your thumbnail with too many elements or text. A clean, simple design is often more effective.
- Make it relevant: Your thumbnail should accurately represent the content of your video.
- Test different designs: Be bold and experiment with design elements and layouts to find what works best for your brand.

Want To Be a Valorant YouTuber? Learn From These 5 Ones
If you’re interested in becoming a Valorant YouTuber, there are many successful content creators in the Valorant community whom you can learn from. Here are five Valorant YouTubers that are worth checking out:
1. Shroud – Well-Known Valorant YouTuber With 6.8M Subscribers
Shroud is a well-known and respected content creator and player in the Valorant community. He has a strong background in professional CS:GO and has continued to thrive in the competitive Valorant scene despite being older than many other eSports players.
He is known for his gameplay videos and relaxed, easygoing personality, contributing to his widespread popularity and admiration among fans. In addition to his professional gameplay, Shroud is highly skilled and continues to compete at a high level, further solidifying his reputation as a top Valorant player.

2. TenZ – Popular Valorant Player With 1.6M Subscribers
TenZ is a highly skilled and popular Valorant player and content creator known for his exceptional ability in the game. He has achieved a high level of success and has been recognized as one of the best Valorant players in the world.
In addition to his full matches and 1v1 videos, TenZ also produces educational content, providing tips and tricks to his viewers. Despite facing some challenges and setbacks, TenZ has remained a prominent figure in the Valorant community and continues to be highly respected for his skills and contributions.

![]() FX PRO (Gold Robot + Silver Robot(Basic Package))
FX PRO (Gold Robot + Silver Robot(Basic Package))
3. n0ted – Prolific Valorant YouTuber With 614k Subscribers
n0ted is a dedicated and prolific Valorant content creator, consistently uploading new videos to his YouTube channel daily. He offers a wide range of content, including gameplay highlights, funny moments, helpful tips, and updates on the latest happenings in the Valorant community.
His channel is a reliable source for those looking for consistently fresh and diverse Valorant content on YouTube. Whether you’re interested in learning new strategies, having a few laughs, or staying up to date with the latest developments in the game, n0ted’s channel has something for everyone.

4. Hiko - Valorant Content Creator With 382k YouTube Subscrbers
Hiko is a well-known Valorant content creator and former player of Counter-Strike: Global Offensive (CS:GO). He is known for his skill in first-person shooter games and his expertise in Valorant, which he shares through tips and gameplay videos on his channels on Twitch and YouTube.
Hiko is currently a content creator for 100 Thieves, a gaming organization he represents in various tournaments and competitions. He is a reliable source of high-quality Valorant content and regularly uploads new videos for his followers.


5. C9 meL – Professional Valorant Player With 33.6K YouTube Subscribers
C9 meL is a highly respected professional Valorant player and leader of the team Cloud 9 White. She is known for her sense of humor, helpful tips, and Agent tutorials and montages. As the in-game leader for her team, MeL has developed exceptional game sense and strategic skills, making her a valuable teacher and resource for other players.
In addition to her instructional content, MeL’s videos often feature a mix of comedy and skill, making them enjoyable for entertainment and improvement purposes. Overall, MeL is a talented and well-respected member of the Valorant community.
 Allavsoft Batch Download Online Videos, Music Offline to MP4, MP3, MOV, etc format

Conclusion
Creating a Valorant thumbnail for your YouTube videos can be important for promoting and attracting views to your content. Using Filmora, you can easily create a thumbnail for free by following the steps outlined in this article.
Additionally, there are many successful Valorant YouTubers who offer a range of content and can serve as inspiration for those interested in starting their channel. Creating visually appealing and engaging thumbnails ensures that your videos stand out and draw in viewers.
Free Download For macOS 10.14 or later
Not only is Filmora a powerful video editing software, and it has a range of features and tools that make it easy to design and create custom thumbnails. Even better, you can use the trial version of Filmora to create a thumbnail for free. You need to download the trial version and start experimenting with the various design tools and templates to create a thumbnail that reflects your style and brand.
Creating a Valorant thumbnail for YouTube using Filmora can be very easy. Just follow these steps:
Step1 Take a screenshot of your gameplay by pressing the “F12“ key on your keyboard while in the game. This will save the screenshot to your computer.

Step2 Launch Filmora and create a new project.
Step3 Import the screenshot into the media library by clicking the “Import“ button.

Step4 Drag the screenshot from the media library into the timeline.
Step5 Use the “Smart Cutout“ feature to select and cut out specific elements from the screenshot.
Step6 Choose the elements of the screenshot that you want to keep.

Step7 Remove any parts of the screenshot that you do not want to include in the thumbnail.
Step8 Extract the selected elements from the screenshot. You can resize the elements as desired.

Step9 Add a background to the track below the screenshot by dragging a background image from the media library into the timeline. Alternatively, you can import your image as a background by clicking the “Import“ button and selecting the image file from your computer.
Step10 Add an effect, such as a gun effect, by searching for the desired effect in the “Effects“ tab and dragging it into the timeline.
Step11 Adjust the opacity of the effect as desired.
Step12 Add some titles and texts for your thumbnail.

Step13 Customize the appearance and rotation of the fire effect as desired.
Step14 Edit the texts and adjust the appearance of the texts in the Titles window.
Step15 Choose a still frame that you like and take a snapshot of it.
 PCDJ DEX 3 for Windows & MAC is the total entertainment DJ software solution, offering audio, video, and karaoke mixing ability. Automatic beat-sync, smart looping, 4 decks, DJ MIDI controller support, Karaoke Streaming and much more.
Step16 Select the snapshot format and storage path. The snapshot will appear in the media library.
Step17 Right-click on the snapshot and select “Reveal in Explorer“ to find the file on your computer. You can now use it as your Valorant thumbnail.
Please note that while using the trial version of Filmora, a watermark will be added to the exported video. However, the watermark will not be added to the snapshot, so you can use the snapshot as your Valorant thumbnail without any issues.
Tips for Making Awesome Thumbnails for Your YouTube Valorant Videos
By following these tips, you can create an eye-catching and effective thumbnail for your Valorant YouTube videos that will help boost your views and engagement.
- Use high-quality images and graphics: A thumbnail with low-quality or pixelated images will not be as effective as a thumbnail with clear, high-resolution graphics.
- Use bold, eye-catching colors: Bright colors can help your thumbnail stand out in a crowded feed.
- Include relevant text: Use text to give viewers an idea of what to expect from your video and to entice them to click.
- Use clear, legible fonts: Make sure the text on your thumbnail is easy to read and doesn’t distract from the overall design.
- Keep it simple: Avoid overcrowding your thumbnail with too many elements or text. A clean, simple design is often more effective.
- Make it relevant: Your thumbnail should accurately represent the content of your video.
- Test different designs: Be bold and experiment with design elements and layouts to find what works best for your brand.
Want To Be a Valorant YouTuber? Learn From These 5 Ones
If you’re interested in becoming a Valorant YouTuber, there are many successful content creators in the Valorant community whom you can learn from. Here are five Valorant YouTubers that are worth checking out:
1. Shroud – Well-Known Valorant YouTuber With 6.8M Subscribers
Shroud is a well-known and respected content creator and player in the Valorant community. He has a strong background in professional CS:GO and has continued to thrive in the competitive Valorant scene despite being older than many other eSports players.
He is known for his gameplay videos and relaxed, easygoing personality, contributing to his widespread popularity and admiration among fans. In addition to his professional gameplay, Shroud is highly skilled and continues to compete at a high level, further solidifying his reputation as a top Valorant player.
2. TenZ – Popular Valorant Player With 1.6M Subscribers
TenZ is a highly skilled and popular Valorant player and content creator known for his exceptional ability in the game. He has achieved a high level of success and has been recognized as one of the best Valorant players in the world.
In addition to his full matches and 1v1 videos, TenZ also produces educational content, providing tips and tricks to his viewers. Despite facing some challenges and setbacks, TenZ has remained a prominent figure in the Valorant community and continues to be highly respected for his skills and contributions.
3. n0ted – Prolific Valorant YouTuber With 614k Subscribers
n0ted is a dedicated and prolific Valorant content creator, consistently uploading new videos to his YouTube channel daily. He offers a wide range of content, including gameplay highlights, funny moments, helpful tips, and updates on the latest happenings in the Valorant community.
His channel is a reliable source for those looking for consistently fresh and diverse Valorant content on YouTube. Whether you’re interested in learning new strategies, having a few laughs, or staying up to date with the latest developments in the game, n0ted’s channel has something for everyone.
4. Hiko - Valorant Content Creator With 382k YouTube Subscrbers
Hiko is a well-known Valorant content creator and former player of Counter-Strike: Global Offensive (CS:GO). He is known for his skill in first-person shooter games and his expertise in Valorant, which he shares through tips and gameplay videos on his channels on Twitch and YouTube.
Hiko is currently a content creator for 100 Thieves, a gaming organization he represents in various tournaments and competitions. He is a reliable source of high-quality Valorant content and regularly uploads new videos for his followers.

5. C9 meL – Professional Valorant Player With 33.6K YouTube Subscribers
C9 meL is a highly respected professional Valorant player and leader of the team Cloud 9 White. She is known for her sense of humor, helpful tips, and Agent tutorials and montages. As the in-game leader for her team, MeL has developed exceptional game sense and strategic skills, making her a valuable teacher and resource for other players.
In addition to her instructional content, MeL’s videos often feature a mix of comedy and skill, making them enjoyable for entertainment and improvement purposes. Overall, MeL is a talented and well-respected member of the Valorant community.
Conclusion
Creating a Valorant thumbnail for your YouTube videos can be important for promoting and attracting views to your content. Using Filmora, you can easily create a thumbnail for free by following the steps outlined in this article.
Additionally, there are many successful Valorant YouTubers who offer a range of content and can serve as inspiration for those interested in starting their channel. Creating visually appealing and engaging thumbnails ensures that your videos stand out and draw in viewers.
Step-by-Step Guide to Crafting YouTube Splitscreen Content
How to Make a Creative Split-screen Video for YouTube?

Liza Brown
Oct 26, 2023• Proven solutions
If we talk about post-production techniques and visual effects, then Split Screen has to be one of the smartest picks. After all, it lets us narrate our story via two (or more) screens and gives our audience a superior viewing experience. Though, a lot of users find it hard to implement the split-screen effect on YouTube videos. Here, I will let you know how to come up with all kinds of YouTube split-screen videos by using a professional video editor.
Part 1: The Diverse Applications of Split-screen Videos
Before we discuss how to work on YouTube split-screen videos, let’s quickly consider some major applications of this video effect.
One of the most popular applications of split-screen videos is for comparing two or more instances or perspectives in the same frame. For example, you might wish to depict the lifestyle of two people from different parts of the world or simply compare the effect of various seasons in a single video.

Videos are the best visual storytelling tools and just like any story, they can also have different perspectives. Ideally, the split-screen effect would be one of the best ways to show your audience all kinds of perspectives that can take place in your story.
One of the best examples was depicted in the movie “500 Days of Summer” in which we got several Expectations vs. Reality shots. These split-screen shots depicted the two major perspectives of the story in a single frame.
 The BootIt Collection covers multi-booting, partitioning, and disk imaging on traditional PC’s using the standard BIOS and newer PC’s using UEFI. The collection includes BootIt Bare Metal (BIBM) for standard BIOS systems and BootIt UEFI (BIU) for UEFI system.
Have you ever wondered how filmmakers create a clone of a person in movies? To do that, we make the protagonist record both the scenes in front of the same background. Later, we implement a split-screen effect in which both the clips are combined in such a way that it makes the audience believe as if the scene has both, the character and their clone placed flawlessly.

 PaperScan Professional: PaperScan Scanner Software is a powerful TWAIN & WIA scanning application centered on one idea: making document acquisition an unparalleled easy task for anyone.
Watch Video! Use Split-Screen for Your YouTube Videos
Part 2: How to Make Creative YouTube Split-screen Videos with Wondershare Filmora ?
If you want to come up with professional YouTube split-screen videos, then consider using a resourceful tool like Wondershare Filmora. Recently, the company has launched Wondershare Filmora for Mac V10.2 with an upgraded set of newly-added split-screen templates . Therefore, you can simply use the wide range of split-screen templates in Filmora and drag-and-drop your videos to implement the effect.
- Wondershare Filmora has recently added an extensive range of split-screen templates that you can instantly use and customize to meet your requirements.
- Apart from YouTube split-screen templates, you can also find options for other social platforms such as Instagram, Facebook, TikTok, etc.
- Without undergoing any technical hassle, you can just drag and drop your videos to the split-screen template and further make the needed changes.
- There are also dedicated options to edit the split-screen video, apply color correction, and even implement different stunning animated effects.
- Besides that, you can use Filmora to access numerous other editing options like motion tracking, keyframing, audio ducking, auto reframing, action cam editing, and more.


Creating or editing YouTube split-screen videos in Wondershare Filmora is extremely easy and can be done in the following way:
Step 1: Import the Videos You Want to Edit to Wondershare Filmora
Before you edit your YouTube split-screen video, you need to import clips to the application. To do this, just launch Wondershare Filmora on your system and click on the “Import” button to load your videos. You can also go to its Menu > File > Import Media to do the same.

Step 2: Select the Split-screen Template and Add Your Videos
Great! Once you have loaded the interface of Filmora, you can locate a “Split Screen” section from the top. Just click on it to browse a wide range of split-screen video templates for YouTube to include two, three, or more clips. You can just double-click any template to get its preview and drag-and-drop it to the timeline to start working on it.

If you want, you can take the playhead and drag the pointer to adjust the length of the split-screen template on the timeline. To add your clips, just double-click on the split-screen template and click on the drop icon from the preview window. Now, click on the source clip to add it to the template and adjust its position to get the desired effects.


Step 3: Edit Your YouTube Split-screen Video
Following the same drill, you can include multiple clips to the YouTube split-screen template. You can further go to its editing features and explore the “Video” tab to scale, reposition, or rotate your clips. There are also options to add borders in the split-screen effect to separate the clips distinctively in the video.

Apart from that, you can also go to the “Color” section to access various color correction features. From here, you can adjust the brightness, temperature, saturation, tint, and other effects in the video.

If you want to make your YouTube split-screen video more appealing, then go to the “Motion” feature. Here, you can easily implement any existing animated template for transitions and other effects.

Besides that, you can also click on the edit icon from the bottom panel of the Preview section to edit your videos separately.

Step 4: Export the YouTube Split-screen Video
That’s it! Once you are done editing the split-screen video, you can export it from Filmora and save it on your Mac. Just click on the Export option and select a location to save the YouTube split-screen video. There are also additional features to save the video in different formats, video resolutions, and frame rates here that you can explore.


There you go! After following this guide, you would be able to come up with all kinds of YouTube split-screen videos on your Mac. Ideally, with the help of a resourceful tool like Wondershare Filmora, working on a split-screen video is an effortless task. Since the tool has numerous split-screen templates for YouTube, you can just select any template, and customize it to create a stunning YouTube split-screen video in minutes.

Liza Brown
Liza Brown is a writer and a lover of all things video.
Follow @Liza Brown
Liza Brown
Oct 26, 2023• Proven solutions
If we talk about post-production techniques and visual effects, then Split Screen has to be one of the smartest picks. After all, it lets us narrate our story via two (or more) screens and gives our audience a superior viewing experience. Though, a lot of users find it hard to implement the split-screen effect on YouTube videos. Here, I will let you know how to come up with all kinds of YouTube split-screen videos by using a professional video editor.
Part 1: The Diverse Applications of Split-screen Videos
Before we discuss how to work on YouTube split-screen videos, let’s quickly consider some major applications of this video effect.
One of the most popular applications of split-screen videos is for comparing two or more instances or perspectives in the same frame. For example, you might wish to depict the lifestyle of two people from different parts of the world or simply compare the effect of various seasons in a single video.
 TubeDigger - online video downloader from mostly any site
Videos are the best visual storytelling tools and just like any story, they can also have different perspectives. Ideally, the split-screen effect would be one of the best ways to show your audience all kinds of perspectives that can take place in your story.
One of the best examples was depicted in the movie “500 Days of Summer” in which we got several Expectations vs. Reality shots. These split-screen shots depicted the two major perspectives of the story in a single frame.
Have you ever wondered how filmmakers create a clone of a person in movies? To do that, we make the protagonist record both the scenes in front of the same background. Later, we implement a split-screen effect in which both the clips are combined in such a way that it makes the audience believe as if the scene has both, the character and their clone placed flawlessly.
Watch Video! Use Split-Screen for Your YouTube Videos
Part 2: How to Make Creative YouTube Split-screen Videos with Wondershare Filmora ?
If you want to come up with professional YouTube split-screen videos, then consider using a resourceful tool like Wondershare Filmora. Recently, the company has launched Wondershare Filmora for Mac V10.2 with an upgraded set of newly-added split-screen templates . Therefore, you can simply use the wide range of split-screen templates in Filmora and drag-and-drop your videos to implement the effect.
- Wondershare Filmora has recently added an extensive range of split-screen templates that you can instantly use and customize to meet your requirements.
- Apart from YouTube split-screen templates, you can also find options for other social platforms such as Instagram, Facebook, TikTok, etc.
- Without undergoing any technical hassle, you can just drag and drop your videos to the split-screen template and further make the needed changes.
- There are also dedicated options to edit the split-screen video, apply color correction, and even implement different stunning animated effects.
- Besides that, you can use Filmora to access numerous other editing options like motion tracking, keyframing, audio ducking, auto reframing, action cam editing, and more.
Creating or editing YouTube split-screen videos in Wondershare Filmora is extremely easy and can be done in the following way:
Step 1: Import the Videos You Want to Edit to Wondershare Filmora
Before you edit your YouTube split-screen video, you need to import clips to the application. To do this, just launch Wondershare Filmora on your system and click on the “Import” button to load your videos. You can also go to its Menu > File > Import Media to do the same.
Step 2: Select the Split-screen Template and Add Your Videos
Great! Once you have loaded the interface of Filmora, you can locate a “Split Screen” section from the top. Just click on it to browse a wide range of split-screen video templates for YouTube to include two, three, or more clips. You can just double-click any template to get its preview and drag-and-drop it to the timeline to start working on it.
If you want, you can take the playhead and drag the pointer to adjust the length of the split-screen template on the timeline. To add your clips, just double-click on the split-screen template and click on the drop icon from the preview window. Now, click on the source clip to add it to the template and adjust its position to get the desired effects.
Step 3: Edit Your YouTube Split-screen Video
Following the same drill, you can include multiple clips to the YouTube split-screen template. You can further go to its editing features and explore the “Video” tab to scale, reposition, or rotate your clips. There are also options to add borders in the split-screen effect to separate the clips distinctively in the video.
 Epubor Audible Converter for Win: Download and convert Audible AAXC/AA/AAX to MP3 with 100% original quality preserved.
Apart from that, you can also go to the “Color” section to access various color correction features. From here, you can adjust the brightness, temperature, saturation, tint, and other effects in the video.
If you want to make your YouTube split-screen video more appealing, then go to the “Motion” feature. Here, you can easily implement any existing animated template for transitions and other effects.
Besides that, you can also click on the edit icon from the bottom panel of the Preview section to edit your videos separately.
 vMix HD - Software based live production. vMix HD includes everything in vMix Basic HD plus 1000 inputs, Video List, 4 Overlay Channels, and 1 vMix Call

Step 4: Export the YouTube Split-screen Video
That’s it! Once you are done editing the split-screen video, you can export it from Filmora and save it on your Mac. Just click on the Export option and select a location to save the YouTube split-screen video. There are also additional features to save the video in different formats, video resolutions, and frame rates here that you can explore.

There you go! After following this guide, you would be able to come up with all kinds of YouTube split-screen videos on your Mac. Ideally, with the help of a resourceful tool like Wondershare Filmora, working on a split-screen video is an effortless task. Since the tool has numerous split-screen templates for YouTube, you can just select any template, and customize it to create a stunning YouTube split-screen video in minutes.
Liza Brown
Liza Brown is a writer and a lover of all things video.
Follow @Liza Brown
Liza Brown
Oct 26, 2023• Proven solutions
If we talk about post-production techniques and visual effects, then Split Screen has to be one of the smartest picks. After all, it lets us narrate our story via two (or more) screens and gives our audience a superior viewing experience. Though, a lot of users find it hard to implement the split-screen effect on YouTube videos. Here, I will let you know how to come up with all kinds of YouTube split-screen videos by using a professional video editor.
Part 1: The Diverse Applications of Split-screen Videos
Before we discuss how to work on YouTube split-screen videos, let’s quickly consider some major applications of this video effect.
One of the most popular applications of split-screen videos is for comparing two or more instances or perspectives in the same frame. For example, you might wish to depict the lifestyle of two people from different parts of the world or simply compare the effect of various seasons in a single video.
Videos are the best visual storytelling tools and just like any story, they can also have different perspectives. Ideally, the split-screen effect would be one of the best ways to show your audience all kinds of perspectives that can take place in your story.
One of the best examples was depicted in the movie “500 Days of Summer” in which we got several Expectations vs. Reality shots. These split-screen shots depicted the two major perspectives of the story in a single frame.
Have you ever wondered how filmmakers create a clone of a person in movies? To do that, we make the protagonist record both the scenes in front of the same background. Later, we implement a split-screen effect in which both the clips are combined in such a way that it makes the audience believe as if the scene has both, the character and their clone placed flawlessly.
Watch Video! Use Split-Screen for Your YouTube Videos
Part 2: How to Make Creative YouTube Split-screen Videos with Wondershare Filmora ?
If you want to come up with professional YouTube split-screen videos, then consider using a resourceful tool like Wondershare Filmora. Recently, the company has launched Wondershare Filmora for Mac V10.2 with an upgraded set of newly-added split-screen templates . Therefore, you can simply use the wide range of split-screen templates in Filmora and drag-and-drop your videos to implement the effect.
- Wondershare Filmora has recently added an extensive range of split-screen templates that you can instantly use and customize to meet your requirements.
- Apart from YouTube split-screen templates, you can also find options for other social platforms such as Instagram, Facebook, TikTok, etc.
- Without undergoing any technical hassle, you can just drag and drop your videos to the split-screen template and further make the needed changes.
- There are also dedicated options to edit the split-screen video, apply color correction, and even implement different stunning animated effects.
- Besides that, you can use Filmora to access numerous other editing options like motion tracking, keyframing, audio ducking, auto reframing, action cam editing, and more.
Creating or editing YouTube split-screen videos in Wondershare Filmora is extremely easy and can be done in the following way:

Step 1: Import the Videos You Want to Edit to Wondershare Filmora
Before you edit your YouTube split-screen video, you need to import clips to the application. To do this, just launch Wondershare Filmora on your system and click on the “Import” button to load your videos. You can also go to its Menu > File > Import Media to do the same.

Step 2: Select the Split-screen Template and Add Your Videos
Great! Once you have loaded the interface of Filmora, you can locate a “Split Screen” section from the top. Just click on it to browse a wide range of split-screen video templates for YouTube to include two, three, or more clips. You can just double-click any template to get its preview and drag-and-drop it to the timeline to start working on it.
If you want, you can take the playhead and drag the pointer to adjust the length of the split-screen template on the timeline. To add your clips, just double-click on the split-screen template and click on the drop icon from the preview window. Now, click on the source clip to add it to the template and adjust its position to get the desired effects.
Step 3: Edit Your YouTube Split-screen Video
Following the same drill, you can include multiple clips to the YouTube split-screen template. You can further go to its editing features and explore the “Video” tab to scale, reposition, or rotate your clips. There are also options to add borders in the split-screen effect to separate the clips distinctively in the video.
Apart from that, you can also go to the “Color” section to access various color correction features. From here, you can adjust the brightness, temperature, saturation, tint, and other effects in the video.
If you want to make your YouTube split-screen video more appealing, then go to the “Motion” feature. Here, you can easily implement any existing animated template for transitions and other effects.
Besides that, you can also click on the edit icon from the bottom panel of the Preview section to edit your videos separately.
 OtsAV DJ Pro

Step 4: Export the YouTube Split-screen Video
That’s it! Once you are done editing the split-screen video, you can export it from Filmora and save it on your Mac. Just click on the Export option and select a location to save the YouTube split-screen video. There are also additional features to save the video in different formats, video resolutions, and frame rates here that you can explore.
There you go! After following this guide, you would be able to come up with all kinds of YouTube split-screen videos on your Mac. Ideally, with the help of a resourceful tool like Wondershare Filmora, working on a split-screen video is an effortless task. Since the tool has numerous split-screen templates for YouTube, you can just select any template, and customize it to create a stunning YouTube split-screen video in minutes.

Liza Brown
Liza Brown is a writer and a lover of all things video.
Follow @Liza Brown
Liza Brown
Oct 26, 2023• Proven solutions
If we talk about post-production techniques and visual effects, then Split Screen has to be one of the smartest picks. After all, it lets us narrate our story via two (or more) screens and gives our audience a superior viewing experience. Though, a lot of users find it hard to implement the split-screen effect on YouTube videos. Here, I will let you know how to come up with all kinds of YouTube split-screen videos by using a professional video editor.
Part 1: The Diverse Applications of Split-screen Videos
Before we discuss how to work on YouTube split-screen videos, let’s quickly consider some major applications of this video effect.
One of the most popular applications of split-screen videos is for comparing two or more instances or perspectives in the same frame. For example, you might wish to depict the lifestyle of two people from different parts of the world or simply compare the effect of various seasons in a single video.

WPS Office Premium ( File Recovery, Photo Scanning, Convert PDF)–Yearly
Videos are the best visual storytelling tools and just like any story, they can also have different perspectives. Ideally, the split-screen effect would be one of the best ways to show your audience all kinds of perspectives that can take place in your story.
One of the best examples was depicted in the movie “500 Days of Summer” in which we got several Expectations vs. Reality shots. These split-screen shots depicted the two major perspectives of the story in a single frame.
Have you ever wondered how filmmakers create a clone of a person in movies? To do that, we make the protagonist record both the scenes in front of the same background. Later, we implement a split-screen effect in which both the clips are combined in such a way that it makes the audience believe as if the scene has both, the character and their clone placed flawlessly.
 SwifDoo PDF Perpetual (1 PC) Free upgrade. No monthly fees ever.
Watch Video! Use Split-Screen for Your YouTube Videos
Part 2: How to Make Creative YouTube Split-screen Videos with Wondershare Filmora ?
If you want to come up with professional YouTube split-screen videos, then consider using a resourceful tool like Wondershare Filmora. Recently, the company has launched Wondershare Filmora for Mac V10.2 with an upgraded set of newly-added split-screen templates . Therefore, you can simply use the wide range of split-screen templates in Filmora and drag-and-drop your videos to implement the effect.
- Wondershare Filmora has recently added an extensive range of split-screen templates that you can instantly use and customize to meet your requirements.
- Apart from YouTube split-screen templates, you can also find options for other social platforms such as Instagram, Facebook, TikTok, etc.
- Without undergoing any technical hassle, you can just drag and drop your videos to the split-screen template and further make the needed changes.
- There are also dedicated options to edit the split-screen video, apply color correction, and even implement different stunning animated effects.
- Besides that, you can use Filmora to access numerous other editing options like motion tracking, keyframing, audio ducking, auto reframing, action cam editing, and more.
Creating or editing YouTube split-screen videos in Wondershare Filmora is extremely easy and can be done in the following way:
Step 1: Import the Videos You Want to Edit to Wondershare Filmora
Before you edit your YouTube split-screen video, you need to import clips to the application. To do this, just launch Wondershare Filmora on your system and click on the “Import” button to load your videos. You can also go to its Menu > File > Import Media to do the same.
 Power Tools add-on for Google Sheets, 12-month subscription
Step 2: Select the Split-screen Template and Add Your Videos
Great! Once you have loaded the interface of Filmora, you can locate a “Split Screen” section from the top. Just click on it to browse a wide range of split-screen video templates for YouTube to include two, three, or more clips. You can just double-click any template to get its preview and drag-and-drop it to the timeline to start working on it.
 DLNow Video Downloader
If you want, you can take the playhead and drag the pointer to adjust the length of the split-screen template on the timeline. To add your clips, just double-click on the split-screen template and click on the drop icon from the preview window. Now, click on the source clip to add it to the template and adjust its position to get the desired effects.
Step 3: Edit Your YouTube Split-screen Video
Following the same drill, you can include multiple clips to the YouTube split-screen template. You can further go to its editing features and explore the “Video” tab to scale, reposition, or rotate your clips. There are also options to add borders in the split-screen effect to separate the clips distinctively in the video.
Apart from that, you can also go to the “Color” section to access various color correction features. From here, you can adjust the brightness, temperature, saturation, tint, and other effects in the video.
If you want to make your YouTube split-screen video more appealing, then go to the “Motion” feature. Here, you can easily implement any existing animated template for transitions and other effects.
Besides that, you can also click on the edit icon from the bottom panel of the Preview section to edit your videos separately.
Step 4: Export the YouTube Split-screen Video
That’s it! Once you are done editing the split-screen video, you can export it from Filmora and save it on your Mac. Just click on the Export option and select a location to save the YouTube split-screen video. There are also additional features to save the video in different formats, video resolutions, and frame rates here that you can explore.
There you go! After following this guide, you would be able to come up with all kinds of YouTube split-screen videos on your Mac. Ideally, with the help of a resourceful tool like Wondershare Filmora, working on a split-screen video is an effortless task. Since the tool has numerous split-screen templates for YouTube, you can just select any template, and customize it to create a stunning YouTube split-screen video in minutes.
Liza Brown
Liza Brown is a writer and a lover of all things video.
Follow @Liza Brown
- Title: [New] In 2024, Blueprints to Masterful Valorant Thumbnail Designs on Social Platforms
- Author: Kenneth
- Created at : 2024-07-31 23:13:52
- Updated at : 2024-08-01 23:13:52
- Link: https://facebook-video-footage.techidaily.com/new-in-2024-blueprints-to-masterful-valorant-thumbnail-designs-on-social-platforms/
- License: This work is licensed under CC BY-NC-SA 4.0.