"In 2024, YouTube Banner Blueprints A Gamers' Design Handbook"
YouTube Banner Blueprints: A Gamers’ Design Handbook
Gaming videos have become increasingly popular on YouTube, especially among young people. It is not uncommon for older folk to enjoy this type of content, especially if they want to unwind after a long day. However, the industry is becoming pretty crowded, making it harder for content creators to stand out from the crowd.
An excellent way to get your target audience to notice you would be to design a killer YouTube banner that will immediately cause anyone scrolling past to click on your video. Stick around to learn how to create a great gaming YouTube banner with templates.
Importance of a Banner for Your YouTube Gaming Channel
Imagine a scenario where you want to open a brick-and-mortar store. One of the most important things you need to get out of the way is the business name. Once you have settled on a fitting name, you will then move on to create a sign to place outside your shop.
For example, a banner for your YouTube gaming channel plays a similar role to signage for a brick-and-mortar shop.
- An excellent banner helps you make a solid first impression on your viewers, some of who is viewing your content for the first time.
- Secondly, a well-designed banner reflects positively on your brand and helps you grow your audience at a steady rate.
- Thirdly, you can use your banner to give your viewers a rough idea of what your video is about without them clicking to watch. A suitable banner can cause anticipation to build within your viewers. Once the video is over, they won’t resist visiting your channel to see what else you offer.

Guide to YouTube Gaming Banner Size
We can liken a banner for your YouTube video to a book cover to a novel you have been dying to read. Therefore, it would be wise to get the size right if you want to create an excellent first impression for yourself. Ideally, the best size for a YouTube banner is 2560*1440 pixels or an aspect ratio of 16:9.
We urge you not to upload a banner smaller than 2048*1152 pixels, or else the image will appear cropped. Keep your banner within 1235*338 pixels and centered on the screen to be on the safe side.
This YouTube banner dimension is ideal for viewing on any device since your audience might use their smartphones or laptop to watch your videos on YouTube. Lastly, ensure you keep the file to a maximum of 6MB. We believe this file size is pretty generous.
Tips for Designing an Attractive Gaming YouTube Banner
Below are some tips that will help you create beautiful YouTube banners.
Simplicity is key: Contrary to popular belief, a simple banner looks more polished than a complex one. If your YouTube banner has too many elements, your viewers using their mobile phones might have a challenge viewing the image.
Ensure the graphics are high-quality : Nothing is as frustrating to your viewers as seeing a blurry or pixelated YouTube banner. However, high-quality graphics with a resolution of at least 1920*1080 pixels make your work look polished and attract more viewers to your channel.
Leverage the grid system: Some of your viewers might watch your videos from their smartphones, and others on their laptops or tablets. The grid system allows you to ensure the full banner will be visible no matter what device your audience will use to watch your gaming videos.
Add a CTA: At the end of the day, you are trying to grow your audience on your YouTube channel. You might also have other social media platforms where you post content. Since your banner is one of the first things your audience will see, you could include a short, easy-to-read, and understandable call to action. For instance, you could encourage them to “Subscribe Now!”
Incorporate your unique color scheme: By now, you already have a theme for your YouTube channel that your existing subscribers associate with you. As you design your YouTube banner, ensure you incorporate your theme colors, so new visitors know what colors to look out for as they scroll on the platform.
 Project Manager - Asset Browser for 3Ds Max
Why Use Templates To Create Gaming YouTube Banners?
First and foremost, a gaming youtube banner template takes the tedium out of creating a design from scratch. They are also systematized, meaning you can download a template specifically for YouTube that comes in the correct dimensions. Most importantly, templates designed for gaming YouTube banners are optimized to help you generate more organic traffic to your channel.
You probably have other expenses breathing down your neck. No need to add your YouTube banner to the list. A youtube gaming channel banner template a budget-friendly way to create stunning designs for your banner that actually look good. If you are lucky, you might find free programs to help you create gorgeous YouTube banners for your gaming channel.
Make YouTube Gaming Banners With Templates in Filmora
Now that you understand why a gaming channel banner template is essential for your YouTube channel, you might wonder where you can find some good ones to incorporate into your videos. Don’t worry because Filmora is precisely what you need.
Wondershare Filmora has a fantastic template feature that helps you make creative videos effortlessly. You can use the preset templates in the platform, saving you lots of time you would have spent designing your template from scratch. We guarantee you cannot exhaust the 1000+ templates this platform offers, meaning you are spoilt for choice!
If you want to customize your video, you can replace the stock videos that come with the preset templates with footage from your internal storage. In addition, Wondershare Filmora lets you share your favorite templates with other content creators who would also like to try making their own cool videos.
Free Download For Win 7 or later(64-bit)
Free Download For macOS 10.14 or later
Below is a detailed step-by-step guide on how to make a gaming YouTuber banner template with Wondershare Filmora.
Step 1. After creating a project with Filmora, click on the “File” tab, wait for a drop-down menu to appear, and select “Project Settings.”
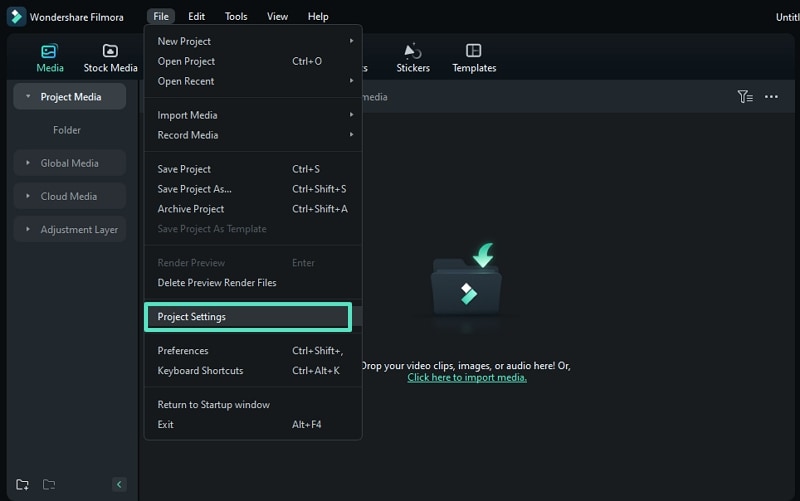
Step 2. Once a dialogue box appears, go to the “Resolution” tab and adjust the resolution to 2560*1140.
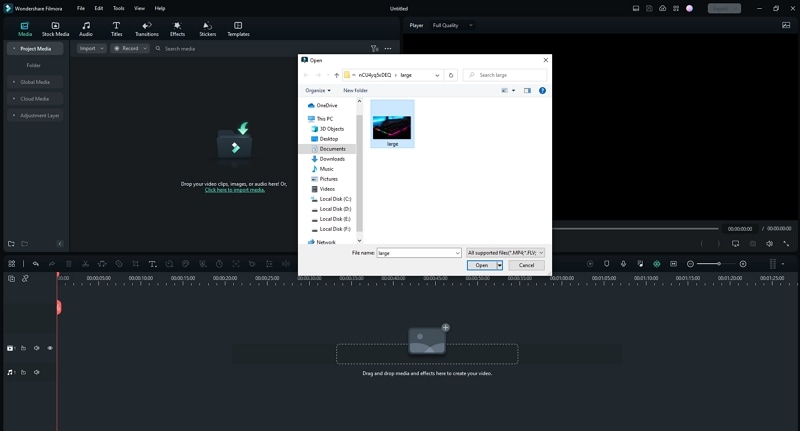
Step 3. Upload your footage or photo from your internal storage by clicking on the logo below.
Step 4. Click on the “Template” tab at the top of the page and click “Game.” Browse the available templates till you see one you like.

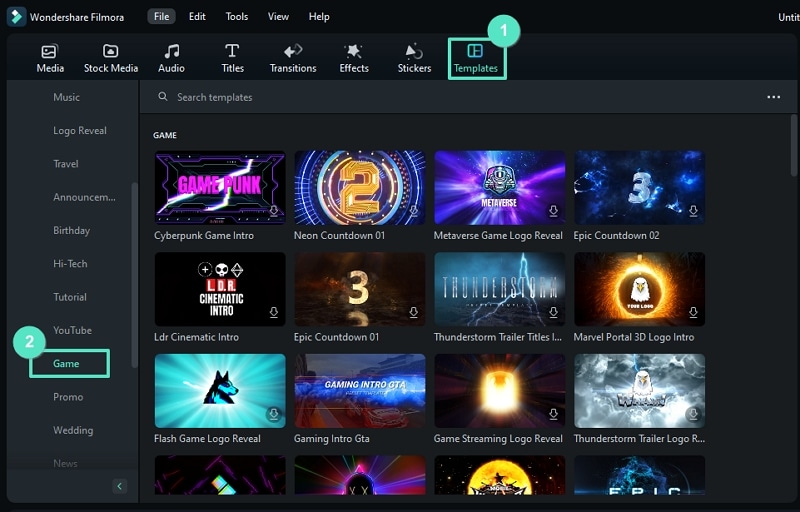
Step 5. Drag and drop the template you have chosen to the timeline as shown below.
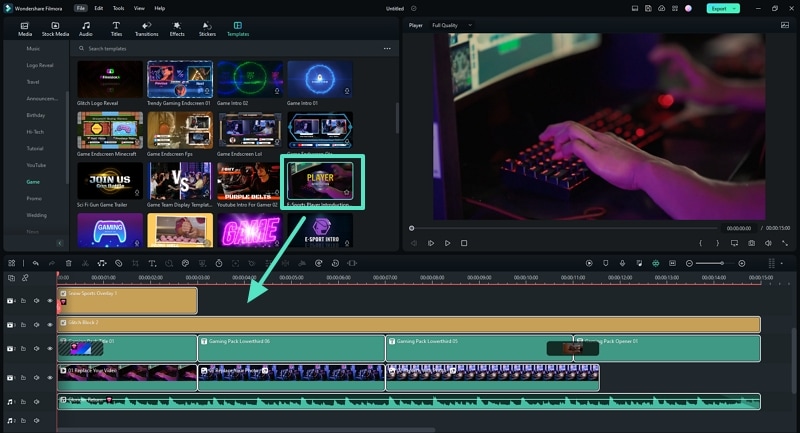
Step 6. Replace the sample footage in the template by dragging and dropping your own footage into the timeline.

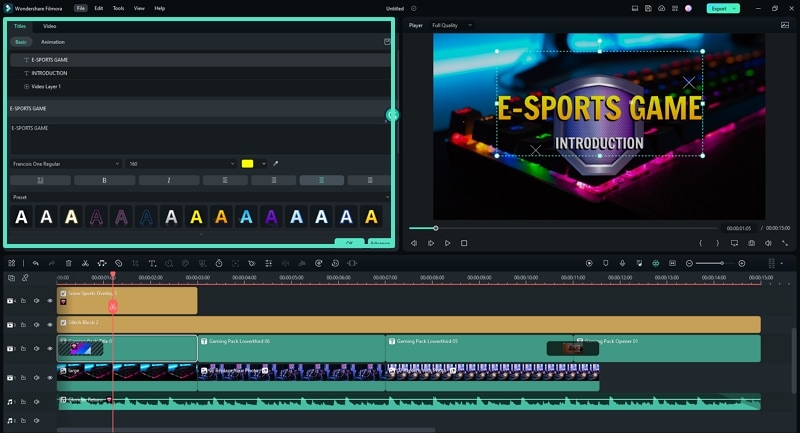
Step 7. Customize the footage and change the settings until you are happy with the outcome. Edit the text using the tools provided in the platform.

WPS Office Premium ( File Recovery, Photo Scanning, Convert PDF)–Yearly
Step 8. Take a screenshot of the final result.

Step 9. Specify the snapshot format and choose the storage location before saving a copy to your device.

Step 10. Once the snapshot appears in the Media Panel, right-click on it to open. Select “Reveal in Explorer” to locate the picture in your internal storage. You can now use the photo as your YouTube gaming banner.

5 Websites for Gaming Banner Templates Your YouTube
Wondershare Filmora is not the only platform you can use to create banner templates for your YouTube channel. Here is a list of 5 more websites you can try and a detailed breakdown of the remarkable features you are bound to enjoy.
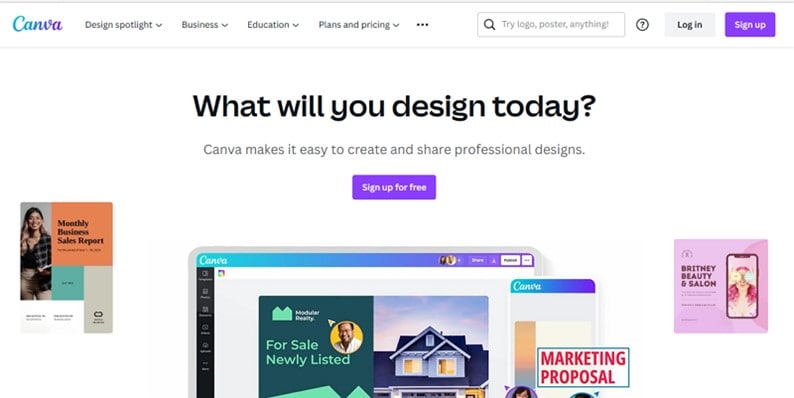
1. Canva
The first alternative to Filmora on our list is Canva, which has thousands of professional, ready-made designs to wow your audience. You can work alone or with a dedicated team to ensure you design only the best banner for your channel to attract the masses to the kind of content you create.
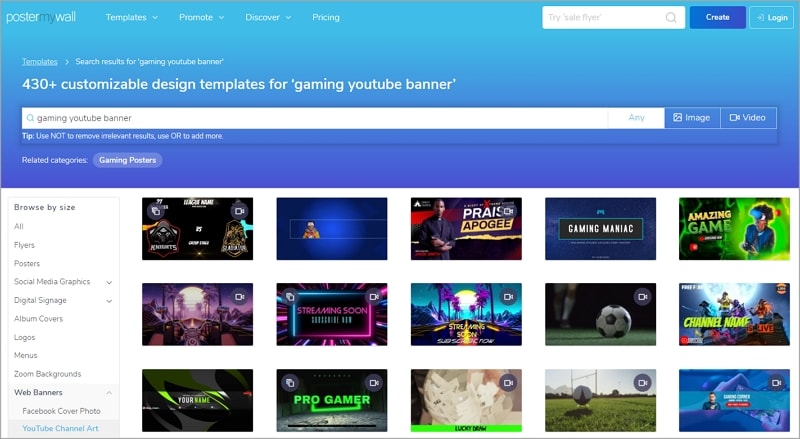
2. PosterMyWall
We couldn’t forget to include PosterMyWall to our list, which has pre-made templates you can customize to suit your needs. With PosterMyWall, you can save the time you could have used to design a banner from scratch to think of more content for your channel. The developers suggest various templates you might like, not to mention that you can sign up for free!

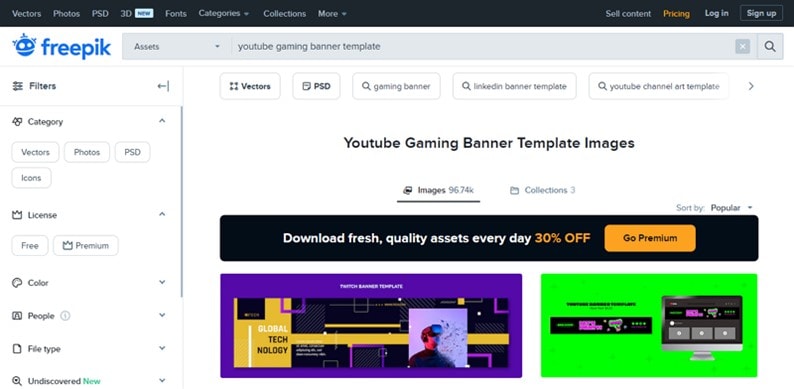
3. Freepik
Another suitable alternative to Filmora is Freepik. We guarantee you cannot exhaust all the numerous templates this platform offers. Each template is unique, with different color combinations and fonts to cater to the theme colors on your YouTube channel. You could opt for the free version or sign up for a Premium account and get 30% off.
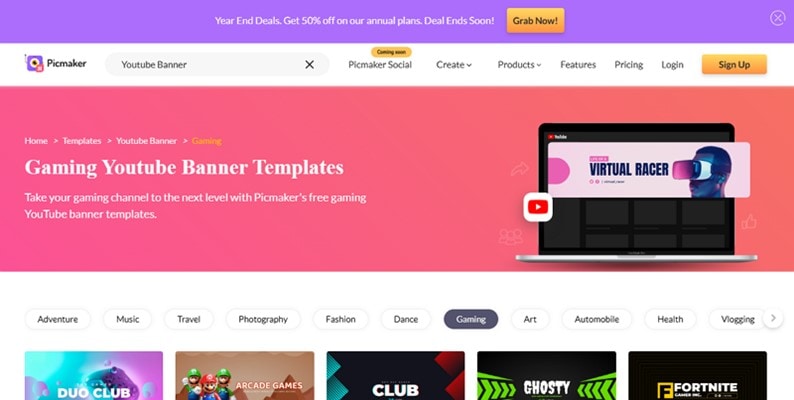
4. Pickmaker
The fourth alternative on our list is Pickmaker, a sure way to take your gaming channel to the next level. The templates are arranged in broad categories to help you pick the best one based on the type of content you post. In addition, you don’t have to part with your precious monies to start designing YouTube banners with Pickmaker.
5. Placeit
Last but definitely not least is Placeit, which contains picturesque templates fitting for a gaming YouTube channel. We guarantee your audience won’t resist clicking on your videos once you use any of the templates within this platform. All you need to do is create a free account to enjoy the perks. Placeit makes your work easier by allowing you to indicate your favorite templates for use later.
 Epubor Audible Converter for Win: Download and convert Audible AAXC/AA/AAX to MP3 with 100% original quality preserved.
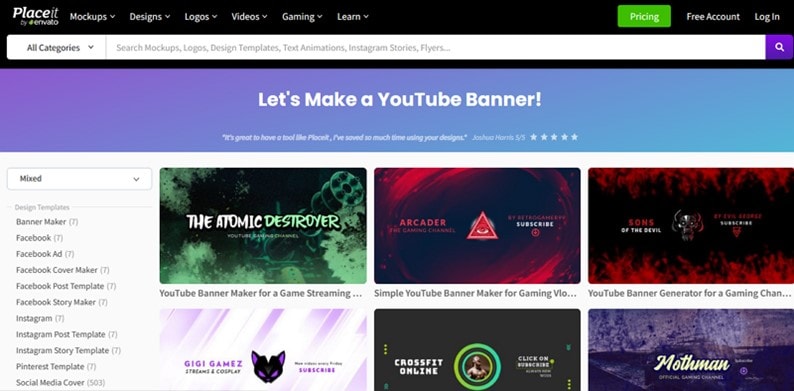
Conclusion
Gaming content is far from boring, and neither should your banner. Remember, your audience will judge you based on your banner, the first content they interact with before they click to watch your video.
The better you can design your banner, the higher your chances of growing an audience that supports you by watching your content regularly. Once you have created an enticing banner, all that’s left is to ensure you have the content to match.
Free Download For macOS 10.14 or later
Below is a detailed step-by-step guide on how to make a gaming YouTuber banner template with Wondershare Filmora.
Step 1. After creating a project with Filmora, click on the “File” tab, wait for a drop-down menu to appear, and select “Project Settings.”

Step 2. Once a dialogue box appears, go to the “Resolution” tab and adjust the resolution to 2560*1140.
Step 3. Upload your footage or photo from your internal storage by clicking on the logo below.
Step 4. Click on the “Template” tab at the top of the page and click “Game.” Browse the available templates till you see one you like.
Step 5. Drag and drop the template you have chosen to the timeline as shown below.
 CalendarBudget - Monthly subscription membership to CalendarBudget via web browser or mobile app. Support included.
Step 6. Replace the sample footage in the template by dragging and dropping your own footage into the timeline.
Step 7. Customize the footage and change the settings until you are happy with the outcome. Edit the text using the tools provided in the platform.
Step 8. Take a screenshot of the final result.
 Screensaver Factory, Create stunning professional screensavers within minutes. Create screensavers for yourself, for marketing or unlimited royalty-free commercial distribution. Make screensavers from images, video and swf flash, add background music and smooth sprite and transition effects. Screensaver Factory is very easy to use, and it enables you to make self-installing screensaver files and CDs for easy setup and distribution. Screensaver Factory is the most advanced software of its kind.
Step 9. Specify the snapshot format and choose the storage location before saving a copy to your device.
Step 10. Once the snapshot appears in the Media Panel, right-click on it to open. Select “Reveal in Explorer” to locate the picture in your internal storage. You can now use the photo as your YouTube gaming banner.


5 Websites for Gaming Banner Templates Your YouTube
Wondershare Filmora is not the only platform you can use to create banner templates for your YouTube channel. Here is a list of 5 more websites you can try and a detailed breakdown of the remarkable features you are bound to enjoy.
 vMix Basic HD - Software based live production. vMix Basic HD includes 4 inputs, 3 cameras, streaming, recording, playlist.
1. Canva
The first alternative to Filmora on our list is Canva, which has thousands of professional, ready-made designs to wow your audience. You can work alone or with a dedicated team to ensure you design only the best banner for your channel to attract the masses to the kind of content you create.
 Glarysoft File Recovery Pro - Helps to recover your lost file/data, even permanently deleted data.
2. PosterMyWall
We couldn’t forget to include PosterMyWall to our list, which has pre-made templates you can customize to suit your needs. With PosterMyWall, you can save the time you could have used to design a banner from scratch to think of more content for your channel. The developers suggest various templates you might like, not to mention that you can sign up for free!

3. Freepik
Another suitable alternative to Filmora is Freepik. We guarantee you cannot exhaust all the numerous templates this platform offers. Each template is unique, with different color combinations and fonts to cater to the theme colors on your YouTube channel. You could opt for the free version or sign up for a Premium account and get 30% off.
4. Pickmaker
The fourth alternative on our list is Pickmaker, a sure way to take your gaming channel to the next level. The templates are arranged in broad categories to help you pick the best one based on the type of content you post. In addition, you don’t have to part with your precious monies to start designing YouTube banners with Pickmaker.

5. Placeit
Last but definitely not least is Placeit, which contains picturesque templates fitting for a gaming YouTube channel. We guarantee your audience won’t resist clicking on your videos once you use any of the templates within this platform. All you need to do is create a free account to enjoy the perks. Placeit makes your work easier by allowing you to indicate your favorite templates for use later.

Conclusion
Gaming content is far from boring, and neither should your banner. Remember, your audience will judge you based on your banner, the first content they interact with before they click to watch your video.
The better you can design your banner, the higher your chances of growing an audience that supports you by watching your content regularly. Once you have created an enticing banner, all that’s left is to ensure you have the content to match.
Free Download For macOS 10.14 or later
Below is a detailed step-by-step guide on how to make a gaming YouTuber banner template with Wondershare Filmora.
Step 1. After creating a project with Filmora, click on the “File” tab, wait for a drop-down menu to appear, and select “Project Settings.”
 Power Tools add-on for Google Sheets, Lifetime subscription
Step 2. Once a dialogue box appears, go to the “Resolution” tab and adjust the resolution to 2560*1140.
Step 3. Upload your footage or photo from your internal storage by clicking on the logo below.
Step 4. Click on the “Template” tab at the top of the page and click “Game.” Browse the available templates till you see one you like.
Step 5. Drag and drop the template you have chosen to the timeline as shown below.
Step 6. Replace the sample footage in the template by dragging and dropping your own footage into the timeline.
 TubeDigger - online video downloader from mostly any site
Step 7. Customize the footage and change the settings until you are happy with the outcome. Edit the text using the tools provided in the platform.
Step 8. Take a screenshot of the final result.
Step 9. Specify the snapshot format and choose the storage location before saving a copy to your device.
 WonderFox DVD Ripper Pro
Step 10. Once the snapshot appears in the Media Panel, right-click on it to open. Select “Reveal in Explorer” to locate the picture in your internal storage. You can now use the photo as your YouTube gaming banner.
5 Websites for Gaming Banner Templates Your YouTube
Wondershare Filmora is not the only platform you can use to create banner templates for your YouTube channel. Here is a list of 5 more websites you can try and a detailed breakdown of the remarkable features you are bound to enjoy.
1. Canva
The first alternative to Filmora on our list is Canva, which has thousands of professional, ready-made designs to wow your audience. You can work alone or with a dedicated team to ensure you design only the best banner for your channel to attract the masses to the kind of content you create.
2. PosterMyWall
We couldn’t forget to include PosterMyWall to our list, which has pre-made templates you can customize to suit your needs. With PosterMyWall, you can save the time you could have used to design a banner from scratch to think of more content for your channel. The developers suggest various templates you might like, not to mention that you can sign up for free!
3. Freepik
Another suitable alternative to Filmora is Freepik. We guarantee you cannot exhaust all the numerous templates this platform offers. Each template is unique, with different color combinations and fonts to cater to the theme colors on your YouTube channel. You could opt for the free version or sign up for a Premium account and get 30% off.
4. Pickmaker
The fourth alternative on our list is Pickmaker, a sure way to take your gaming channel to the next level. The templates are arranged in broad categories to help you pick the best one based on the type of content you post. In addition, you don’t have to part with your precious monies to start designing YouTube banners with Pickmaker.
 The Tube Sites Submitter is a fast and efficient tool for anyone who needs to upload videos quickly, easily and automatically to hundreds of tube sites in mere minutes .

5. Placeit
Last but definitely not least is Placeit, which contains picturesque templates fitting for a gaming YouTube channel. We guarantee your audience won’t resist clicking on your videos once you use any of the templates within this platform. All you need to do is create a free account to enjoy the perks. Placeit makes your work easier by allowing you to indicate your favorite templates for use later.

Conclusion
Gaming content is far from boring, and neither should your banner. Remember, your audience will judge you based on your banner, the first content they interact with before they click to watch your video.
The better you can design your banner, the higher your chances of growing an audience that supports you by watching your content regularly. Once you have created an enticing banner, all that’s left is to ensure you have the content to match.
Free Download For macOS 10.14 or later
Below is a detailed step-by-step guide on how to make a gaming YouTuber banner template with Wondershare Filmora.
Step 1. After creating a project with Filmora, click on the “File” tab, wait for a drop-down menu to appear, and select “Project Settings.”
Step 2. Once a dialogue box appears, go to the “Resolution” tab and adjust the resolution to 2560*1140.
Step 3. Upload your footage or photo from your internal storage by clicking on the logo below.
Step 4. Click on the “Template” tab at the top of the page and click “Game.” Browse the available templates till you see one you like.
Step 5. Drag and drop the template you have chosen to the timeline as shown below.

Step 6. Replace the sample footage in the template by dragging and dropping your own footage into the timeline.
Step 7. Customize the footage and change the settings until you are happy with the outcome. Edit the text using the tools provided in the platform.
Step 8. Take a screenshot of the final result.
Step 9. Specify the snapshot format and choose the storage location before saving a copy to your device.
Step 10. Once the snapshot appears in the Media Panel, right-click on it to open. Select “Reveal in Explorer” to locate the picture in your internal storage. You can now use the photo as your YouTube gaming banner.
5 Websites for Gaming Banner Templates Your YouTube
Wondershare Filmora is not the only platform you can use to create banner templates for your YouTube channel. Here is a list of 5 more websites you can try and a detailed breakdown of the remarkable features you are bound to enjoy.
1. Canva
The first alternative to Filmora on our list is Canva, which has thousands of professional, ready-made designs to wow your audience. You can work alone or with a dedicated team to ensure you design only the best banner for your channel to attract the masses to the kind of content you create.
2. PosterMyWall
We couldn’t forget to include PosterMyWall to our list, which has pre-made templates you can customize to suit your needs. With PosterMyWall, you can save the time you could have used to design a banner from scratch to think of more content for your channel. The developers suggest various templates you might like, not to mention that you can sign up for free!
 ZoneAlarm Pro Antivirus + Firewall NextGen
3. Freepik
Another suitable alternative to Filmora is Freepik. We guarantee you cannot exhaust all the numerous templates this platform offers. Each template is unique, with different color combinations and fonts to cater to the theme colors on your YouTube channel. You could opt for the free version or sign up for a Premium account and get 30% off.
 The BootIt Collection covers multi-booting, partitioning, and disk imaging on traditional PC’s using the standard BIOS and newer PC’s using UEFI. The collection includes BootIt Bare Metal (BIBM) for standard BIOS systems and BootIt UEFI (BIU) for UEFI system.
4. Pickmaker
The fourth alternative on our list is Pickmaker, a sure way to take your gaming channel to the next level. The templates are arranged in broad categories to help you pick the best one based on the type of content you post. In addition, you don’t have to part with your precious monies to start designing YouTube banners with Pickmaker.
5. Placeit
Last but definitely not least is Placeit, which contains picturesque templates fitting for a gaming YouTube channel. We guarantee your audience won’t resist clicking on your videos once you use any of the templates within this platform. All you need to do is create a free account to enjoy the perks. Placeit makes your work easier by allowing you to indicate your favorite templates for use later.
Conclusion
Gaming content is far from boring, and neither should your banner. Remember, your audience will judge you based on your banner, the first content they interact with before they click to watch your video.
The better you can design your banner, the higher your chances of growing an audience that supports you by watching your content regularly. Once you have created an enticing banner, all that’s left is to ensure you have the content to match.
Direction and Intensity in Video Lighting
Lighting Tips for Vlogging: How to Light

Richard Bennett
Mar 27, 2024• Proven solutions
One of the best things you can do for your video quality is to ensure you have great lighting. Viewers find poor lighting distracting and it’s hard for them to see how great your content is if they are busy thinking about why your video is so dark. By creating a great lighting set up you can ensure that the people watching your videos are only thinking about how much they’re enjoying them.
Going outside and using natural light is the cheapest way to get a lot of light for your videos. If your vlog is not suited to the great outdoors then you need to get more strategic. You can turn on all the lights in your living room and still end up with a dark, grainy, video.
Video Lighting Basics: Three Point Lighting

The most common technique of lighting a scene is called three-point lighting. It involves three different sources of light in the shot and is used by portrait photographers, which is also a great method for lighting your vlog.
The brightest source of light is also known as the key light which need to be high quality. A window will work, but if you do not have access to one where you are filming then consider an LED panel light or a softbox light like the ones used in portrait photography.
This first light will create a dramatic shadow across half of your face. You want to reduce this shadow, but not get rid of it completely.
Rather than setting up another light source on the opposite side of the camera, put up a reflector to bounce some light back onto your face. This reflector is called your ‘Fill Light’.
The fill light is less bright than the primary source of light and it is placed on the side opposite to the key light. Its purpose is to reduce shadows produced by the key light and the reflector will need to be mounted on a stand.
The final step to creating three point lighting is to set up another light behind you. This is your ‘Backlight’, and it will help you stand out from your background. Backlight or Hair light is always placed behind and above the subject to create separation between the subject in the shot and the background. This basic lighting technique can be applied in almost every scene you shoot, which is why it is important to keep an open mind and to continue experimenting with possible light setups.
Watch Video! Top Lighting Tips for Vlogging
Lightning Tips for Aspiring YouTube Videographers
Becoming the master of light will take some time and practice, so it is crucial to remain curious and anxious to learn new tricks throughout that process if you want to continually become better. These tips will help you make the first steps on that journey.
1. Focus Your Key Light
Try to focus your Key Light so that it lights only you and not your background. Do this by mounting anything that can cast a shadow onto your Key Light to control the area where the light hits. If you are using a window for your Key Light then you can use a curtain. If you use a softbox light then your light will already be somewhat focused.
2. Use Natural Lighting
The light provided by the Sun is still the best light source, you can have in your video. The trouble is that natural light changes quickly, which makes it highly unpredictable. The best way to deal with this challenge is to come prepared to the set and to get the shot you want as quickly as you can.
3. Try DIY Lightning
Literally, anything from candles to LED light bulbs can serve as a source of light in a shot. You just need to pay attention to the light temperature, because warmer light sources may highlight reds and yellows that can make your footage look less realistic.
4. Use Lightning Kits
This is by far the best option if you want to be in complete control of the light on your set. You can adjust the intensity of the lights, use filters, diffusers and all sorts of other accessories to create the light that flatters the subjects of your videos. The only downside is that you’ll have to spend a considerable amount of money if you want to have a professional lighting kit.
5. Set up reflectors
Sets of reflectors are often under $50, so they are fairly affordable. However, some vloggers choose to forgo purchasing reflectors and make their own out of tinfoil.


If your strong main light is too hard on your eyes then you can use a translucent ‘reflector’ to soften it. Set your translucent reflector, or other screen, up in front of your main light to diffuse it.
If you are hosting a beauty vlog then you might consider a slightly different set up. Instead of having your main light off to one side set it up directly in front of you so your entire face is lit evenly. It is still a good idea to use fill lights in this set up to give you some dimension, and a backlight is even more essential for helping you stand out from the background. The even light hitting your face will also make you look flat if you do not use a backlight.
 /a>
/a>
If you are using all of the lighting options available to you and your video still looks too dark then you can try brightening it by opening up the aperture of your camera lens/setting a lower f-stop. Letting more light into your camera can help your footage look brighter, although you also run the risk of making things look overexposed/ washed out if you are not careful.
If you are stuck shooting in low light conditions it is best to use a lens with a wider aperture/lower f-stop. This will make the best of the light you do have.
Richard Bennett
Richard Bennett is a writer and a lover of all things video.
Follow @Richard Bennett
Richard Bennett
Mar 27, 2024• Proven solutions
One of the best things you can do for your video quality is to ensure you have great lighting. Viewers find poor lighting distracting and it’s hard for them to see how great your content is if they are busy thinking about why your video is so dark. By creating a great lighting set up you can ensure that the people watching your videos are only thinking about how much they’re enjoying them.
Going outside and using natural light is the cheapest way to get a lot of light for your videos. If your vlog is not suited to the great outdoors then you need to get more strategic. You can turn on all the lights in your living room and still end up with a dark, grainy, video.
 dotConnect for Oracle is an ADO.NET data provider for Oracle with Entity Framework Support.
Video Lighting Basics: Three Point Lighting
The most common technique of lighting a scene is called three-point lighting. It involves three different sources of light in the shot and is used by portrait photographers, which is also a great method for lighting your vlog.
The brightest source of light is also known as the key light which need to be high quality. A window will work, but if you do not have access to one where you are filming then consider an LED panel light or a softbox light like the ones used in portrait photography.
This first light will create a dramatic shadow across half of your face. You want to reduce this shadow, but not get rid of it completely.
Rather than setting up another light source on the opposite side of the camera, put up a reflector to bounce some light back onto your face. This reflector is called your ‘Fill Light’.
The fill light is less bright than the primary source of light and it is placed on the side opposite to the key light. Its purpose is to reduce shadows produced by the key light and the reflector will need to be mounted on a stand.
The final step to creating three point lighting is to set up another light behind you. This is your ‘Backlight’, and it will help you stand out from your background. Backlight or Hair light is always placed behind and above the subject to create separation between the subject in the shot and the background. This basic lighting technique can be applied in almost every scene you shoot, which is why it is important to keep an open mind and to continue experimenting with possible light setups.
Watch Video! Top Lighting Tips for Vlogging
Lightning Tips for Aspiring YouTube Videographers
Becoming the master of light will take some time and practice, so it is crucial to remain curious and anxious to learn new tricks throughout that process if you want to continually become better. These tips will help you make the first steps on that journey.
1. Focus Your Key Light
Try to focus your Key Light so that it lights only you and not your background. Do this by mounting anything that can cast a shadow onto your Key Light to control the area where the light hits. If you are using a window for your Key Light then you can use a curtain. If you use a softbox light then your light will already be somewhat focused.
2. Use Natural Lighting
The light provided by the Sun is still the best light source, you can have in your video. The trouble is that natural light changes quickly, which makes it highly unpredictable. The best way to deal with this challenge is to come prepared to the set and to get the shot you want as quickly as you can.
3. Try DIY Lightning
Literally, anything from candles to LED light bulbs can serve as a source of light in a shot. You just need to pay attention to the light temperature, because warmer light sources may highlight reds and yellows that can make your footage look less realistic.
4. Use Lightning Kits
This is by far the best option if you want to be in complete control of the light on your set. You can adjust the intensity of the lights, use filters, diffusers and all sorts of other accessories to create the light that flatters the subjects of your videos. The only downside is that you’ll have to spend a considerable amount of money if you want to have a professional lighting kit.
5. Set up reflectors
Sets of reflectors are often under $50, so they are fairly affordable. However, some vloggers choose to forgo purchasing reflectors and make their own out of tinfoil.
If your strong main light is too hard on your eyes then you can use a translucent ‘reflector’ to soften it. Set your translucent reflector, or other screen, up in front of your main light to diffuse it.
If you are hosting a beauty vlog then you might consider a slightly different set up. Instead of having your main light off to one side set it up directly in front of you so your entire face is lit evenly. It is still a good idea to use fill lights in this set up to give you some dimension, and a backlight is even more essential for helping you stand out from the background. The even light hitting your face will also make you look flat if you do not use a backlight.
If you are using all of the lighting options available to you and your video still looks too dark then you can try brightening it by opening up the aperture of your camera lens/setting a lower f-stop. Letting more light into your camera can help your footage look brighter, although you also run the risk of making things look overexposed/ washed out if you are not careful.
If you are stuck shooting in low light conditions it is best to use a lens with a wider aperture/lower f-stop. This will make the best of the light you do have.
Richard Bennett
Richard Bennett is a writer and a lover of all things video.
Follow @Richard Bennett
Richard Bennett
Mar 27, 2024• Proven solutions
One of the best things you can do for your video quality is to ensure you have great lighting. Viewers find poor lighting distracting and it’s hard for them to see how great your content is if they are busy thinking about why your video is so dark. By creating a great lighting set up you can ensure that the people watching your videos are only thinking about how much they’re enjoying them.
Going outside and using natural light is the cheapest way to get a lot of light for your videos. If your vlog is not suited to the great outdoors then you need to get more strategic. You can turn on all the lights in your living room and still end up with a dark, grainy, video.
Video Lighting Basics: Three Point Lighting
 Allavsoft Batch Download Online Videos, Music Offline to MP4, MP3, MOV, etc format
The most common technique of lighting a scene is called three-point lighting. It involves three different sources of light in the shot and is used by portrait photographers, which is also a great method for lighting your vlog.
The brightest source of light is also known as the key light which need to be high quality. A window will work, but if you do not have access to one where you are filming then consider an LED panel light or a softbox light like the ones used in portrait photography.
This first light will create a dramatic shadow across half of your face. You want to reduce this shadow, but not get rid of it completely.
Rather than setting up another light source on the opposite side of the camera, put up a reflector to bounce some light back onto your face. This reflector is called your ‘Fill Light’.
The fill light is less bright than the primary source of light and it is placed on the side opposite to the key light. Its purpose is to reduce shadows produced by the key light and the reflector will need to be mounted on a stand.
The final step to creating three point lighting is to set up another light behind you. This is your ‘Backlight’, and it will help you stand out from your background. Backlight or Hair light is always placed behind and above the subject to create separation between the subject in the shot and the background. This basic lighting technique can be applied in almost every scene you shoot, which is why it is important to keep an open mind and to continue experimenting with possible light setups.
Watch Video! Top Lighting Tips for Vlogging
Lightning Tips for Aspiring YouTube Videographers
Becoming the master of light will take some time and practice, so it is crucial to remain curious and anxious to learn new tricks throughout that process if you want to continually become better. These tips will help you make the first steps on that journey.
1. Focus Your Key Light
Try to focus your Key Light so that it lights only you and not your background. Do this by mounting anything that can cast a shadow onto your Key Light to control the area where the light hits. If you are using a window for your Key Light then you can use a curtain. If you use a softbox light then your light will already be somewhat focused.
2. Use Natural Lighting
The light provided by the Sun is still the best light source, you can have in your video. The trouble is that natural light changes quickly, which makes it highly unpredictable. The best way to deal with this challenge is to come prepared to the set and to get the shot you want as quickly as you can.
3. Try DIY Lightning
Literally, anything from candles to LED light bulbs can serve as a source of light in a shot. You just need to pay attention to the light temperature, because warmer light sources may highlight reds and yellows that can make your footage look less realistic.
4. Use Lightning Kits
This is by far the best option if you want to be in complete control of the light on your set. You can adjust the intensity of the lights, use filters, diffusers and all sorts of other accessories to create the light that flatters the subjects of your videos. The only downside is that you’ll have to spend a considerable amount of money if you want to have a professional lighting kit.
5. Set up reflectors
Sets of reflectors are often under $50, so they are fairly affordable. However, some vloggers choose to forgo purchasing reflectors and make their own out of tinfoil.
If your strong main light is too hard on your eyes then you can use a translucent ‘reflector’ to soften it. Set your translucent reflector, or other screen, up in front of your main light to diffuse it.
If you are hosting a beauty vlog then you might consider a slightly different set up. Instead of having your main light off to one side set it up directly in front of you so your entire face is lit evenly. It is still a good idea to use fill lights in this set up to give you some dimension, and a backlight is even more essential for helping you stand out from the background. The even light hitting your face will also make you look flat if you do not use a backlight.
If you are using all of the lighting options available to you and your video still looks too dark then you can try brightening it by opening up the aperture of your camera lens/setting a lower f-stop. Letting more light into your camera can help your footage look brighter, although you also run the risk of making things look overexposed/ washed out if you are not careful.
If you are stuck shooting in low light conditions it is best to use a lens with a wider aperture/lower f-stop. This will make the best of the light you do have.
Richard Bennett
Richard Bennett is a writer and a lover of all things video.
Follow @Richard Bennett
Richard Bennett
Mar 27, 2024• Proven solutions
One of the best things you can do for your video quality is to ensure you have great lighting. Viewers find poor lighting distracting and it’s hard for them to see how great your content is if they are busy thinking about why your video is so dark. By creating a great lighting set up you can ensure that the people watching your videos are only thinking about how much they’re enjoying them.
Going outside and using natural light is the cheapest way to get a lot of light for your videos. If your vlog is not suited to the great outdoors then you need to get more strategic. You can turn on all the lights in your living room and still end up with a dark, grainy, video.
Video Lighting Basics: Three Point Lighting
The most common technique of lighting a scene is called three-point lighting. It involves three different sources of light in the shot and is used by portrait photographers, which is also a great method for lighting your vlog.
The brightest source of light is also known as the key light which need to be high quality. A window will work, but if you do not have access to one where you are filming then consider an LED panel light or a softbox light like the ones used in portrait photography.
This first light will create a dramatic shadow across half of your face. You want to reduce this shadow, but not get rid of it completely.
Rather than setting up another light source on the opposite side of the camera, put up a reflector to bounce some light back onto your face. This reflector is called your ‘Fill Light’.
The fill light is less bright than the primary source of light and it is placed on the side opposite to the key light. Its purpose is to reduce shadows produced by the key light and the reflector will need to be mounted on a stand.
The final step to creating three point lighting is to set up another light behind you. This is your ‘Backlight’, and it will help you stand out from your background. Backlight or Hair light is always placed behind and above the subject to create separation between the subject in the shot and the background. This basic lighting technique can be applied in almost every scene you shoot, which is why it is important to keep an open mind and to continue experimenting with possible light setups.

Watch Video! Top Lighting Tips for Vlogging
Lightning Tips for Aspiring YouTube Videographers
Becoming the master of light will take some time and practice, so it is crucial to remain curious and anxious to learn new tricks throughout that process if you want to continually become better. These tips will help you make the first steps on that journey.
1. Focus Your Key Light
Try to focus your Key Light so that it lights only you and not your background. Do this by mounting anything that can cast a shadow onto your Key Light to control the area where the light hits. If you are using a window for your Key Light then you can use a curtain. If you use a softbox light then your light will already be somewhat focused.
2. Use Natural Lighting
The light provided by the Sun is still the best light source, you can have in your video. The trouble is that natural light changes quickly, which makes it highly unpredictable. The best way to deal with this challenge is to come prepared to the set and to get the shot you want as quickly as you can.
3. Try DIY Lightning
Literally, anything from candles to LED light bulbs can serve as a source of light in a shot. You just need to pay attention to the light temperature, because warmer light sources may highlight reds and yellows that can make your footage look less realistic.
4. Use Lightning Kits
This is by far the best option if you want to be in complete control of the light on your set. You can adjust the intensity of the lights, use filters, diffusers and all sorts of other accessories to create the light that flatters the subjects of your videos. The only downside is that you’ll have to spend a considerable amount of money if you want to have a professional lighting kit.
5. Set up reflectors
Sets of reflectors are often under $50, so they are fairly affordable. However, some vloggers choose to forgo purchasing reflectors and make their own out of tinfoil.

If your strong main light is too hard on your eyes then you can use a translucent ‘reflector’ to soften it. Set your translucent reflector, or other screen, up in front of your main light to diffuse it.
If you are hosting a beauty vlog then you might consider a slightly different set up. Instead of having your main light off to one side set it up directly in front of you so your entire face is lit evenly. It is still a good idea to use fill lights in this set up to give you some dimension, and a backlight is even more essential for helping you stand out from the background. The even light hitting your face will also make you look flat if you do not use a backlight.
If you are using all of the lighting options available to you and your video still looks too dark then you can try brightening it by opening up the aperture of your camera lens/setting a lower f-stop. Letting more light into your camera can help your footage look brighter, although you also run the risk of making things look overexposed/ washed out if you are not careful.
If you are stuck shooting in low light conditions it is best to use a lens with a wider aperture/lower f-stop. This will make the best of the light you do have.
Richard Bennett
Richard Bennett is a writer and a lover of all things video.
Follow @Richard Bennett
- Title: In 2024, YouTube Banner Blueprints A Gamers' Design Handbook
- Author: Kenneth
- Created at : 2024-07-31 23:27:33
- Updated at : 2024-08-01 23:27:33
- Link: https://facebook-video-footage.techidaily.com/in-2024-youtube-banner-blueprints-a-gamers-design-handbook/
- License: This work is licensed under CC BY-NC-SA 4.0.